|
|
Post by Seymour on Dec 10, 2016 15:59:21 GMT -5
Thx guys. There is one thing i think i will change though. My timer is 110volt so it runs the power supply. That means when light is called for the power supply has to turn on and charge its caps. During that time the light is also trying to fire up. I think i will add a time delay relay. This will force the bulb to wait ten seconds to fire up. Maybe it will minimize the flickering during startup. Other than that the setup is simple and very compact.
|
|
|
|
Post by WillyCKH on Dec 10, 2016 16:14:43 GMT -5
The delay relay can be easily done with arduino.  |
|
|
|
Post by dvg on Dec 10, 2016 16:47:09 GMT -5
Very cool experiment. The creativity that is expressed on this forum is to be commended. dvg |
|
|
|
Post by Seymour on Dec 10, 2016 16:48:01 GMT -5
Maybe one day ill get one and make the system fully automated.
|
|
|
|
Post by WillyCKH on Dec 11, 2016 16:02:27 GMT -5
To control a relay with an Arduino is quite simple, here's an example: Steps: 1. connect as shown in figure 1 2. program the Arduino with the code provided 3. make sure the connections are correct 4. test and verify  Figure 1 Figure 1// define Arduino GPIO Pin for Relay
#define RELAY_PIN 7
// define delay time, unit=ms
#define DELAY_TIME 10000
void setup() {
// put your setup code here, to run once:
// Initialize Relay Pin as Output
pinMode(RELAY, OUTPUT);
// Time Delay, 1000 ms = 1 second
delay(DELAY_TIME);
// Turn On Relay
digitalWrite(RELAY, HIGH);
}
void loop() {
// put your main code here, to run repeatedly:
}In this setup, as soon as the PSU is turned on by the timer switch, the arduino turns on, and counts for 10s before turning on the relay, which controls the light. You are not limited to one relay, you can control a bunch of relays using this method, and even use one relay for multiple lights (watch out for current rating though). Hope this helps! Willy |
|
|
|
Post by Seymour on Dec 11, 2016 16:42:03 GMT -5
This is awesome willy. You have been more than helpfull. I will really enjoy mixing two of my hobbies in one project. (Technology and horticulture)
|
|
|
|
Post by Seymour on Dec 15, 2016 13:10:57 GMT -5
So the plants dont seem to be bothered by the new light. All my seedlings are growing quite nicely. Even the moss i have seems to be growing at a faster rate. I have not seen any negative effects at all. I will continue to use this light for the winter and in the spring my plan will be to make a new growspace with more room.
|
|
|
|
Post by seasmoke on Dec 16, 2016 20:56:02 GMT -5
Is there glass missing around the lamp or is that the design, it must get very hot.
|
|
|
|
Post by Seymour on Dec 16, 2016 22:42:20 GMT -5
Thats the way its designed. You would not want a child touching it. It gets as hot as a standard automotive halogen bulb.
|
|
|
|
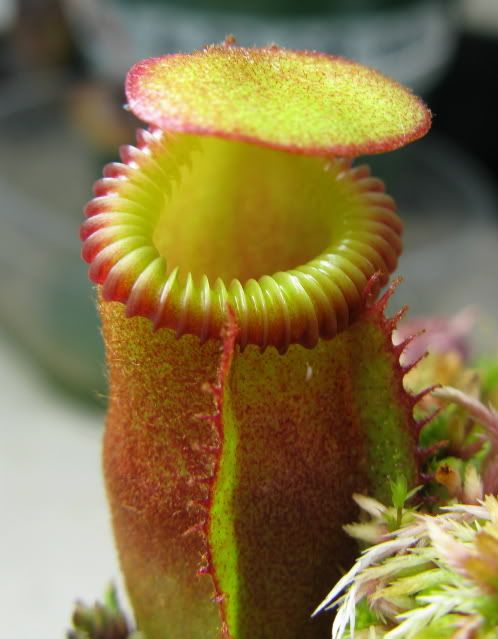
Post by Seymour on Dec 24, 2016 9:24:08 GMT -5
Just an update for everyone. My D. Namibia was growing a flowerstock prior to me changing the light. It has since started a second one.  |
|
|
|
Post by WillyCKH on Dec 24, 2016 11:11:56 GMT -5
Just an update for everyone. My D. Namibia was growing a flowerstock prior to me changing the light. It has since started a second one. Nice plant! |
|
|
|
Post by Seymour on Dec 24, 2016 12:12:17 GMT -5
This one came from cole. He gave it to me as a bonus, It was on its last legs. Rather than giving up on it he gave it to me. It has recovered nicely. I hope to see its flowers soon.
|
|
|
|
Post by mackthompson on Dec 24, 2016 13:14:39 GMT -5
If it floweres wanna trade some seeds?
|
|
|
|
Post by WillyCKH on Dec 24, 2016 13:33:19 GMT -5
If it floweres wanna trade some seeds? Save some for me too!  btw congrats on the results of the HID experiment |
|
|
|
Post by Seymour on Dec 24, 2016 16:29:02 GMT -5
Np guys. You will have first dibs for sure. Ill pm you both when/if the time comes.
|
|